Sunday, January 29, 2012

Grandma Alice’s Coffee Cake


My Grandma is one of the best bakers that I know. Sure, there’s been some kitchen mishaps, such as pies bubbling over and catching the oven on fire, or the legendary “earthquake cake,” which occurred when we iced a layered cake before it was all the way cooled and it proceeded to crumble apart. Overall though, I have fond memories of learning to bake beside my grandma.

Ingredients

So when I discovered that the milk in my fridge was going sour, I of course thought of her coffee cake recipe, in which she often used soured milk in place of buttermilk. The resulting dessert is moist and delicious. This treat was a staple whenever we came to visit or for special occasions like Christmas morning.
Consistency of crumble topping saved out

Begin by mixing the flour, brown sugar, white sugar, cinnamon, butter, and pecans. Mix this until crumbly. You’ll need to save out ¾ cup of this mixture, as it will be crumbled on top.


Add to the mixture the eggs, milk, and soda. Once mixed you’ll begin to notice lots of air bubbles, which help to keep the cake fluffy. If you don't happen to have buttermilk or soured milk on hand, you can make soured milk by adding 1 tablespoon of lemon juice or vinegar to 1 cup of regular milk and allowing it to stand for five minutes.


Pour the mixture into greased pans. I used two square pans, but a single 9x13 size pan would work. 


Sprinkle the crumble mixture on top. Bake in oven for 25-30 minutes at 350 degrees.


Personally, I think that this cake is best enjoyed with a fresh cup of coffee. Yum!

Grandma Alice's Coffee Cake
  • 1 c. brown sugar
  • 1 c. white sugar
  • 1/2 c. butter or margarine
  • 2 c. flour
  • 1 tsp. cinnamon
  • 1/2 c. nuts (optional- I find I prefer pecans)
  • 2 eggs
  • 1 c. buttermilk or soured milk
  • 1 tsp. soda
  1. Combine the first 6 ingredients until crumbly. Take out 3/4 cup for topping.
  2. To the rest, add eggs, buttermilk and soda. Beat thoroughly. Pour into a 9x13-inch pan or two 9x9-inch pans (greased) and sprinkle with topping.
  3. Bake at 350 degrees for 25 to 30 minutes.


The link to this recipe is shared on the blog Under The Table and Dreaming, as are some other great ideas, so check them out if you get a chance!


Tuesday, January 17, 2012

Coffee Table DIY, Part 2


Now that the stain was on the table, it was time to put the pattern on. It was so tricky trying to figure out how to get the pattern transferred to the table and how to make it look symmetrical. I ended up cropping the original picture of the patterned dresser on the computer to isolate one part of the design, as it is simply repeated and flipped (see picture above). I printed out the image which I had also enlarged.


Next, I decided that for actually transferring the pattern to the table I would need it to be on a large sheet of paper, so I ended up using the back of wrapping paper (so cheap and readily available!). I folded the paper in 8 squares to accommodate the pattern, as pictured.      


I made sure that as I folded the paper it was sized right for my table (I had measured and sized the wrapping paper to the size of the table prior to beginning).


To transfer the pattern which I had cropped, I used a technique that I’d done as a kid in puzzle books and kids activity sheets, called drawing using a grid. This involved drawing 8 further squares on both my folded wrapping paper and on the printed pattern. I then copied the pattern square by square to the blank paper.

It's hard to see, but the 8 squares are drawn here.
Below you can lightly see the pattern drawn.

I decided to cut out the pattern. I think I could have simply traced it with a pencil onto the table instead of cutting it out though, since the pressure of tracing would be sufficient to transfer the pattern.  I ended up taping the cut out pattern to the table with blue painter’s tape, which was a little tedious. Using a ruler to clean up the edge lines and make them more precise was helpful too.


**NOTE** You may want to ensure that the folds of the paper are lined up on the correct sides for when unfolding the pattern. I messed this up and ended up with only one complete pattern. You may also want to be careful when tracing the pattern if the stain is still fresh. I made the mistake of wearing a good pair of jeans when I was transferring the pattern to the table. An emergency trip to the hardware store for mineral spirits saved the day, but it was a close call!


Once the pattern was traced on the table, it was time to paint! I used  a large bottle of crème colored acrylic paint  that I’d picked up at
Wal-mart and a one inch bristle brush. Paiting does add to the rustic look- vinyl cutouts from something like a Cricut machine could provide a cleaner look.  


 I finished it all up with multiple coats of protective spray. Polyurethane comes in spray form and I personally found it so easy to use. I chose a satin finish, as I didn't want a really glossy look. The instructions said to apply at least 3 coats, and I think I applied about 6 coats by the time I was done, with about 30 minutes of drying time in between.  The finished product turned out looking great!!

Before


After

 It matches so much better in my apartment now that it's been redone! Yay!! -K


Sunday, January 1, 2012

Coffee Table DIY

Several years ago I went garage sale hunting for a coffee table. I found this bargain table. It’s a bit large though, and when my mom first saw it, her first exclamation was “IT’S HUGE!!” That’s a good sign, right? Ha!


Since then, this coffee table has been the center of many exam cram sessions, bible study discussions with sweet friends, and tasty cooking adventures. I’ve wanted to class it up a bit though, since it is very scratched up and the color doesn’t really match the rest of my furniture. Since I’ve had a whole winter break off from school, this seemed the perfect time to delve into this diy.

Thanks to Pinterest, there were several redo ideas I’d found. First, I found this typography table at the Wild Ink blog


Next I found this awesome pattern painted on a dresser.


I decided I’d use a dark color and keep a rustic look like the letterpress table but would also use the dresser’s design to paint on top.


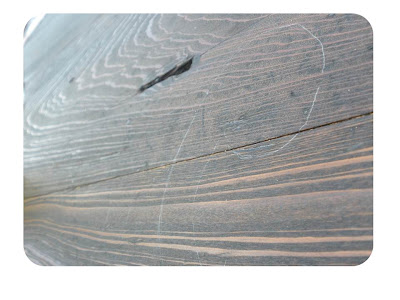
 I started by using my dad’s palm sander to sand down the table. I used medium grit, then fine grit. For some of the curved corners and spaces I had to hand sand the table with the appropriate grit. I think it would have been easier to start out with a larger grit sandpaper first though, and to then work down to medium and small grit. This was the finished surface- it still has some minor dents but I like the rustic look.


Next I picked up a can of Dark Walnut Minwax stain. Make sure when you mix up the stain that you just stir the can and don’t shake it in order to prevent air bubbles. I applied the first coat with a foam brush, using back and forth strokes. I let the stain set for 15 minutes and then wiped it off with a clean rag. Make sure you do this in a well ventilated area. I did the staining outside thanks to our amazing warm southern winter weather, but still managed to get quite a headache from the fumes- a mask might be a good idea!


This is the table with the first coat of stain. Starting to get the look I want, but it needs one more coat.


I’m currently working on the painting the pattern on top, so next blog post I’ll post the results.

Let no one take away your joy today! –K-